About Me

My photo
My blog's main subjects are sewing, the thing in which I am experienced the most, and beadwork, which is, in fact, pushed me into blogging. I am also engaged in knitting and crocheting. All together they are the set of skills which I use to make my wardrobe my whole life. These are not my only interests, I also like the English language (that's one of the reasons that my blog is bilingual), try to travel around my country and abroad (when can afford it), am interested in art (to the degree of a dilettante but nevertheless) and adore the people who can create anything beautiful or useful whatever it is :-) So welcome to a needlecrafter diary!

27 February 2016

Spikes & Co Pendant

Well, all the company is together now... And ready for the adventures... if, of course, anything like this ever happens to jewelry :-) I like the result I've got if to forget about the term of making the pendant. Three weeks of creative pangs can be justified only either by the author's inexperience or by making a masterpiece (and somebody must earn for living, by the way). So, although modesty is not my distinctive feature, I should confess it is something in the middle:-))

While designing the pendant the aim was to avoid the entire repetition of the earrings' and the bracelet's design. I only wanted to use the same colour style and materials.


Кулон "Шипи & компанія"


Ну ось вся компанія і в зборі... Готові до пригод... якщо, звісно, такі колись трапляються з прикрасами:-) Вийшло непогано, якщо забути про термін виготовлення кулону. Три тижні творчих мук можна виправдати або недосвідченістю автора, або створенням шедевра (та ще треба і на життя заробляти), то хоч скромність  не є моєю чеснотою, маю зізнатися, що результат десь по середині :-)) 

Коли вигадувала цей кулон, моєю метою було уникнути повного повтору дизайну сережок і браслета. Я лише хотіла використати однакові матеріали та дотримуватися заданої кольорової гами.

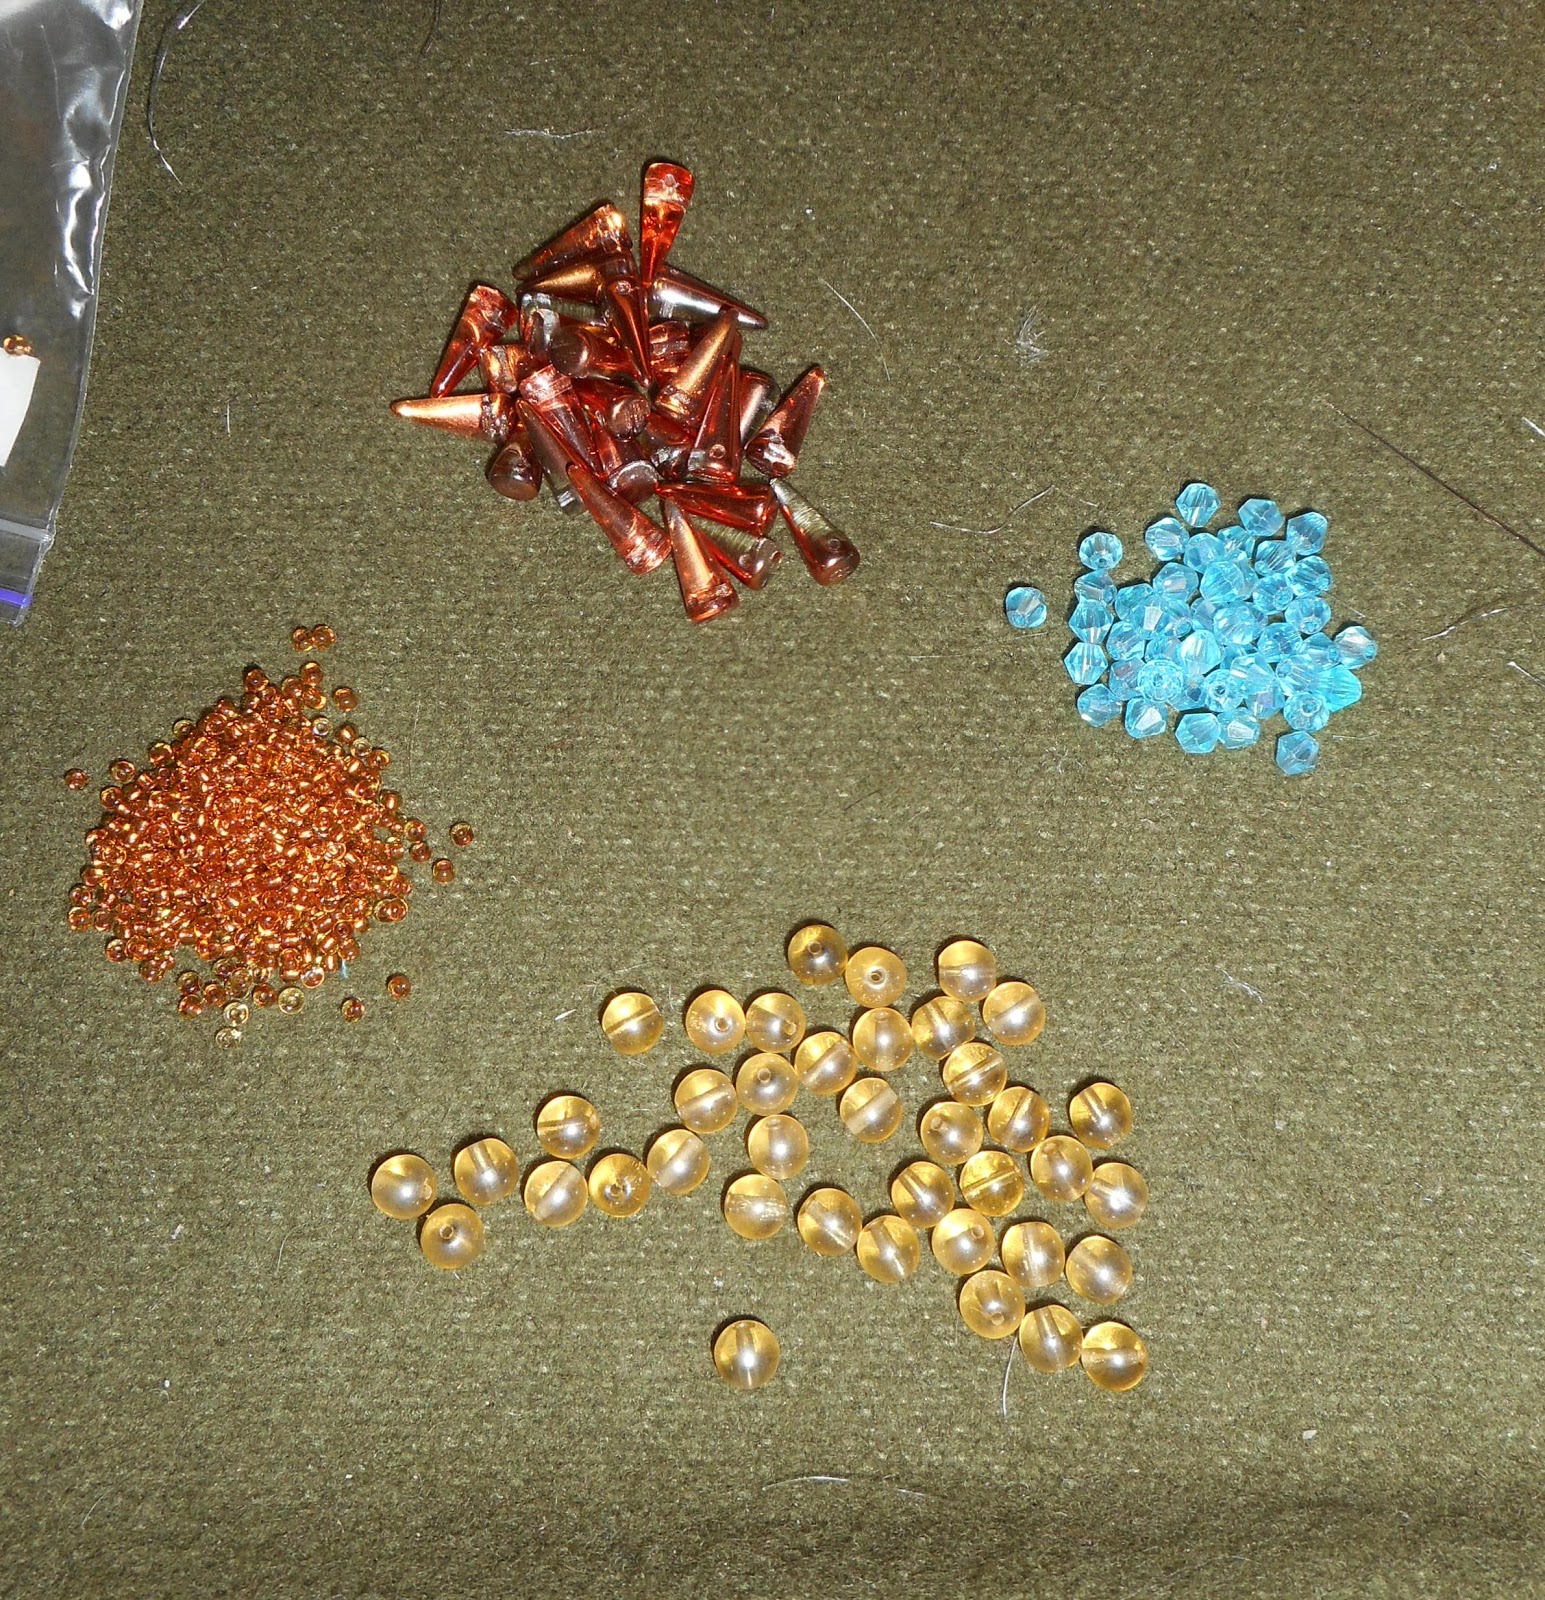
The process started with beading a cabochon. To choose what I need to do for it with my materials, I decided to string different kinds of beads alternating them with spikes and tried them on the pictures which were considered to be future cabochon's back. Very effective method, I certainly will use it again and again.


Процес розпочався з обплетення кабошону. Щоб вибрати, як я можу це зробити з матеріалів, які маю, вирішила нанизувати різні види намистин по черзі з шипами та приміряти їх на світлини, які могли б стати майбутнім фоном кабошону. Дуже ефективний метод, до речі, тому буду користуватись їм і надалі.


The variant of  the spikes  alternating with cuts seemed to be the best. So after gluing the cabochon to the piece of a postcard I beaded such first row.


Шипи поєднані з рубкою здалися мені найкращим варіантом, тому після наклеювання кабошону на клаптик листівки, я нанизала такий перший ряд.


At first I beaded the cabochon's back with twins. It was not long and hard because I already had done it for this rivoli. But this time I worked from the longer row and made decreasing of the twins to the centre.


Спочатку обплела задню частину кабошону твінами. Це було нескладно і недовго, тому що я вже це робила для цього ріволі. Але тут роботу розпочала з довшого ряду, а потім до центру твіни убавляла.


Then after some time of the experimenting beaded the front of the cabochon.


Потім, витративши трохи часу на експерименти, обплела лицеву частину.


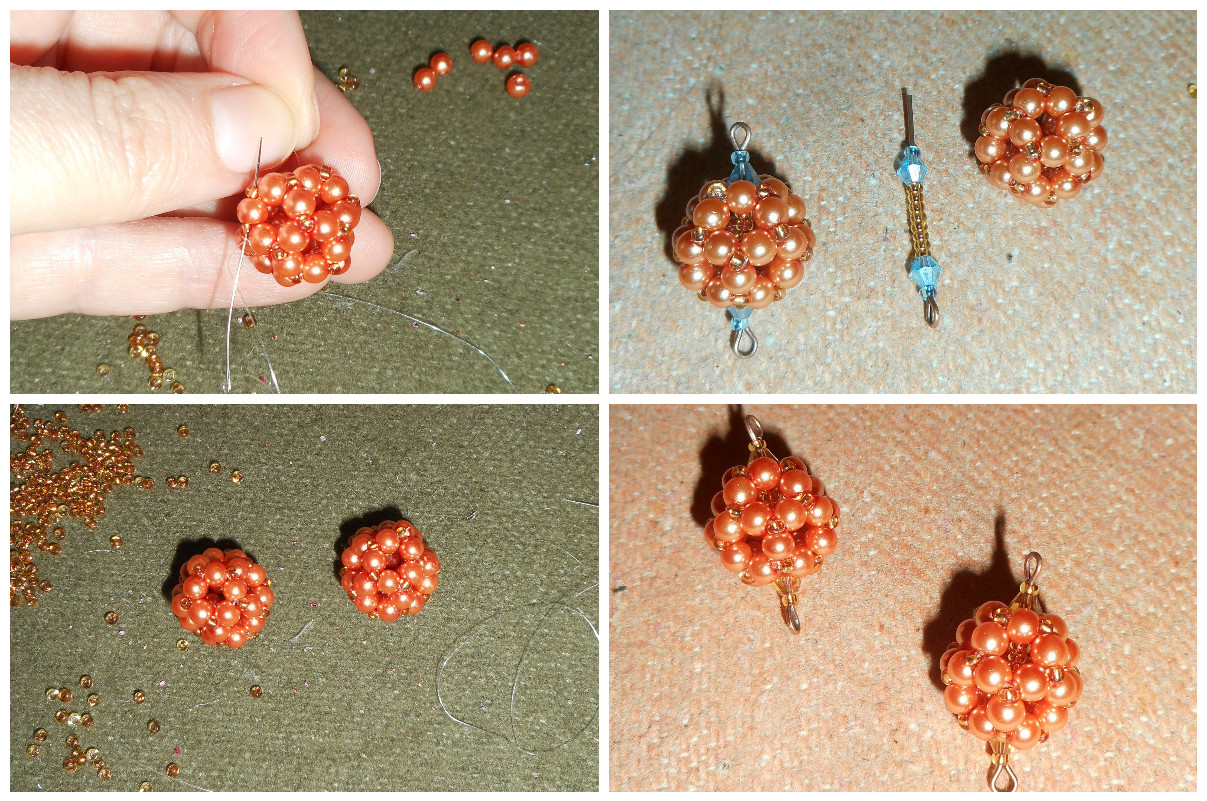
After much more time of thinking and trying what necklace I wanted, the next steps were making the beaded beads. The first one is from 4 mm pearls and 10.0 seed beads. These latter ones are necessary not only to embellish the ready bead but to make it sturdy as well.
When making the element for the necklace as you see at first I used blue 4 mm bicones but in the ready piece they looked not so good so I changed them for topaz colour.
I already used the tutorials for making such bead, for example, in this project.


Після набагато довших спроб і роздумів, яке ж все ж таки я хочу намисто, наступними кроками були виготовлення намистин. Перші - з 4 мм перлів з додаванням бісеру №10. Цей останній необхідний не лише для краси, а і для зміцнення намистини.
На фото видно, що для створення елементу спочатку я використала блакитні 4 мм біконуси, але в готовому виробі вони виглядали недоречно, тому замінила їх на кольору топаза.
МК з виготовлення таких намистин я вже використовувала, наприклад, для цього намиста.


To make a  beaded bead from twins I used this tutorial from +Beadaholique. This bead turned out to be very wobbly so it had to be reinforced with seed beads as well. To make the elements the blue bicones matched well here.
Good question is why I so insisted on adding blue colour to the necklace... Just because the ready pendant remind the sun and the sun needs some sky:-)


Щоб зробити намистину з твінів, скористалася цим МК від +Beadaholique. Ця намистина була дуже "живою", тому її теж довелося зміцнювати бісером. Для виготовлення елементу тут блакитні біконуси  згодилися краще.
Гарне питання,  чому я так наполягала на додаванні блакитного кольору до намиста... просто тому, що кулон формою нагадує сонечко, а сонечку потрібно трохи неба:-)


So the elements are ready and now the rope should be made. I chose the tubular herringbone bead weaving with some inclusions... after much experimenting... yes... chose twins for that. Such alternating made a slight spiral effect and the rope reminded some tree branch with buds (my mum said, the branch is old and dry and my opinion is it is awaiting the sun shine to start blossoming).


Отже елементи готові і настав час сплести якусь основу. Я обрала  техніку "ндебеле" з включенням додаткових намистин... після декількох експериментів... так... додавати вирішила твіни. Таке чергування створило дуже легкий ефект спіралі, а готовий джгут нагадав мені гілочку дерева з  бруньками (мама сказала, що гілочка стара і суха, а на мою думку, вона просто чекає на сонячне світло, щоб почати розпускатися).


And the final step is connecting all the elements and waiting for the occasion to wear the necklace:-)


Останній крок - з'єднання всіх елементів у намисто... І чекання на момент, коли його можна буде вдягнути:-)


19 February 2016

The Red Is for Love and the White Is Just Seed Beads :-) (Filled Tubular Netting Necklace)


The idea to embody the impression made by red berries on the snow got the logical continuation  into a new necklace created with new for me beading technique not to leave these earrings without a company:-)
The technique is simple although requires many materials. At the same time everybody can be a good designer using this filled tubular netting lace because it is very easy to create something new beautiful and really individual with it. 


Червоний - то любов, а білий - то просто бісер :-)

(Сітчастий джгут з наповнювачем)


Ідея втілити враження вид червоних ягід на снігу в якійсь прикрасі логічно отримала продовження у намисті, яке я зробила в новій для мене техніці, щоб не залишати ці милі сережки самотніми :-)
Ця техніка проста хоча і потребує багато матеріалів. Натомість сітчасте плетіння з наповнювачем дозволяє кожному почуватися гарним дизайнером, оскільки не так вже і важко створити з його допомогою щось нове красиве і справді індивідуальне.


So  my interpretation needed about sixty-six 6 mm cherry pearls, eighty-four 4 mm cherry pearls, forty-two 6 mm red crystals, twelve 8 mm crystals, thirty 3x4 red rondelles, about twenty-five grams of seed beads of main colour (pearl white) and not so much of the second colour accent seed beads (transparent with silver tunnel).


Отже моя інтерпретація цієї техніки потребувала шістдесят шість 6 мм вишневих перлин, вісімдесят вісім 4 мм вишневих перлин, сорок два 6 мм червоних кристали, дванадцять 8 мм червоних кристалів, тридцять червоних ронделів 3х4 мм, біля 25 грамів білого перлового бісеру (основний колір) і не дуже багато додаткового (прозорий зі срібними внутрішніми стінками).


It is one of  classic basic techniques and there are many different tutorials on YouTube to learn. As for me, I like this one from +Jill Wiseman. But after looking through several videos I sticked to the idea to use different sizes of the beads for the filling. As I couldn't know what would be the ready length of the rope with bigger beads, I decided to make the central part of it at first and arranged the beads on the mat in the wanted order to include them into the work. Then finished the beading from the ready front piece to both sides. I also changed the beads for smaller sizes and lessened the number of the seed beads. 

Це одна з класичних основних технік і на YouTube є багато відео для навчання. Особисто мені подобається цей майстер клас від +Jill Wiseman. Але переглянувши декілька з них, мене спокусила ідея використати намистини різних розмірів для наповнювача. Оскільки я не могла знати точної довжини цієї частини готового намиста,  то вирішила спочатку нанизати передню частину і просто виклала на столі бажаний порядок намистин, щоб визначитись що за чим нанизувати. По закінченні роботи доплела бокові частини, для чого змінила розміри намистин на менші. Кількість бісеру також змінюються   в залежності від розміру намистин.


The clasp is a usual toggle.


Застібка - звичайний тогл.


  That  what is love on (or under) the snow :-) Cold but very beautiful:-)

                                                      ... I surely have a couple of pieces of red silk somewhere...


   Ось така вона - любов на, чи то під, снігом:-) Холодна, але красива:-)

                                                                ... Десь є у мене пара відрізів  червоного шовку...

16 February 2016

No Guelder Rose, No Girl Earrings :-)


I mean not the berry exactly but the jewelry made of the red beads that remind it with colour. For the title to this short post I chose a changed Ukrainian expression relating the symbolism and meaning of that berry for our culture. It sounds: "There is no Ukraine without guelder rose". The jewelry (mostly necklaces) from red beads (corah-ly) are a part of our national costume. 
Besides this serious cultural background, when choosing the colours and idea for this pair of earrings and the further necklace, I mostly had some stunning image on my mind. And it was unbelievable beauty of the red berries on the snow.


Сережки "Без калини немає... дівчини" :-)

Ну, не те щоб без калини, а мається на увазі без прикрас, які своїми червоними намистинами нагадували б про її, калини, ягоди:-)
Крім серйозного підґрунтя  пов'язаного із значенням калини  в нашій культурі, підбираючи кольори  для цієї пари сережок і майбутнього намиста, я переважно тримала на думці  певний приголомшливий образ, а саме - неймовірну красу червоної ягоди на снігу.


I liked very much these earrings from +Gina's Gem Creations and decided to make them at once but chose the different colour style. My materials are a little different as well. I liked better 6 mm pearl, 4 mm pearl of the same colour (red cherry), instead of 4 mm crystal I used 3 x 4 мм red rondells. Then just followed the instruction.


Мені дуже сподобались ці сережки  від +Gina's Gem Creations  і я одразу вирішила їх зробити, але обрала іншу кольорову гаму. Мої матеріали теж трохи відрізняються. Мені більше сподобались червоні (точніше, вишневі) перлини 6 і 4 мм, а замість 4 мм кристалів, я використала червоні ронделі 3 х 4 мм. Потім все робила за інструкцією.


In the end of the work when reinforcing the last row of white seed beads, it became clear why 6 mm pearls are not very right choice for such a project. They are too smooth and the seed beads were sliding around them. So finally I pulled the thread through all the seed beads around omitting the pearls. It helped to some degree.


При кінці роботи стало зрозуміло, чому 6 мм перлини не такий вже і гарний вибір для таких сережок: вони надто гладенькі і бісерини ковзалися по них весь час. Тому зрештою я протягнула нитку через всі бісерини навколо сережки оминаючи перлини. Це до певної міри допомогло.


I also beaded 6 seed beads for the embellishment instead of 7. They were too many for me maybe because as always I used 10.0 seed beads instead 11.0. So to make the loop in different way.
Besides, I changed the hook itself. When the earrings were ready the hook seemed to be too simple for them so I cut the spring and put a rondelle on it.


Також замість 7 бісерин в останньому ряду оздоблення додавала 6. Можливо тому, що я, як завжди, замість бісеру 11.0 використала 10.0, 7 було забагато. Тому мені довелося петлю для гачка зробити трохи по-іншому.
Крім того, коли сережки були готові, звичайні гачки здалися мені простуватими, тому я зрізала пружинку і нанизала замість неї рондель.


I just love what I get... Both delicate and gentle pieces, great result!

Сережки вийшли і делікатні і яскраві водночас... я просто в захваті!

10 February 2016

Spikes & Co (bracelet)

I am still inspired with spikes and not with their associations but with the beads themselves. A couple of weeks ago when posting the earrings I already suggested that my subconsciousness is the only one that could  explain the idea of the attraction but who cares actually... It is one of those occasions again when the result does the only matter. Thus to talk about the unknown makes no sense but obviously the visible ideas can be the subject here. And this time this subject is a bracelet :-)


Шипи & компанія (браслет)


Шипи все ще надихають мене і при тому не їхні асоціації, а самі намистини. Пару тижнів тому, коли описувала сережки, я вже припускала, що лише моя підсвідомість може пояснити причину їхньої привабливості, але кому до того діло насправді... Це знову один з тих випадків, коли результат тільки і має значення. Отож говорити про невідоме жодного сенсу немає, але вочевидь видимі ідеї тут можуть стати предметом обговорення. І цього разу такий предмет - це браслет :-) 


To make the bracelet I used the tutorial from +Potomac Bead Company. I tried to match about the same materials. But the colour style is different, of course.


Щоб зробити браслет, скористалася майстер класом від +Potomac Bead Company . Намагалася підібрати майже такі самі матеріали. Але кольорова гама, звісно, інша.


I followed the instructions almost entirely. But I'd like to admit that it better to make the bracelet not very loose. Spikes, especially if there are many of them, seem to be able to overturn the bracelet. So it is better to keep it right on the wrist.


Я майже цілком дотримувалась інструкцій. Але хотілося б відзначити, що бажано не робити браслет надто вільним. Шипи, особливо якщо їх багато, здається, здатні той браслет перегорнути. Тому краще, щоб він був якраз по зап'ястку.


My only change - the clasp. First I made the bracelet itself. And then joined new thread, beaded 6 seed beads around the end 6 mm glass beads. Then just added jump rings and a lobster claw clasp.
The most interesting part how I am going to fasten it myself when putting it on... although after few minutes of trying I managed to do at last... and with the left hand only...

Моя єдина зміна - застібка. Спочатку  зробила  браслет. І лише потім приєднала нову нитку, нанизала по 6 бісерин на кінцеву скляну намистину, потім просто додала кільця і застібку.
Найцікавіше, як я збираюсь самостійно застібати браслет, коли вдягатиму... Хоча після декількох хвилин спроб мені такі зрештою вдалося це зробити... але чомусь лише лівою рукою...


2 February 2016

Fitted Stripy Blazer, or Never Say Never:-)


Generally I say this "never"  often :-) But truly speaking, how many such popular phrases are in every day use? I don't mean the wide-spread manner to repeat different clever and not too much quotes of famous and unknown persons instead of reading books, observing life and making own conclusions... I mean their real understanding and acquiring of such sayings. When the words turn upside down our outlook, influence our lifestyle and change our way of thinking... In my life I came across just a few of them and here I'm not going to dive into the process of my personal growth :-) But when it goes about sewing from materials that require special attention and methods (and I mean the very troubles while working with them!) or about the processing certain details, I almost always say, "I'll never do it again". So such "never" is repeated quite regularly and there is just no sense to say it at all:-)


Смугастий блейзер в талію, або ніколи не кажи ніколи:-)


Взагалі я часто кажу це "ніколи":-)) А і справді, скільки таких популярних фраз, якими ми послуговуємося в житті як гаслами? Я не маю на увазі поширену манеру повторювати різні розумні і не дуже цитати відомих і не дуже осіб замість того, щоб читати книжки, спостерігати людей і самому  робити висновки... Я маю на увазі справжнє розуміння і засвоєння таких фраз, коли вони перевертають твій світогляд, впливають на стиль життя і змінюють спосіб мислення... Мені в житті таких декілька трапились, але тут ми не будемо заглиблюватися в давній процес мого зростання як особистості:-) А ось коли йдеться про пошиття різних речей з тканин, які потребують особливо прискіпливої уваги, на початку роботи я часто кажу, що ніколи більше цього не робитиму і маю на увазі мороку з пошиттям речей з таких матеріалів, або з роботою над певними деталями. Отже це "ніколи" повторюється досить регулярно, і тому просто не має жодного сенсу його казати :-)


So... what I "never" do this time :-) Firstly, I'll never sew anything from stripy fabrics. It takes really much time to get symmetry of the stripes while cutting. Secondly, I'll never make welt pockets again.
If I didn't have 4 m fabric  bought just because it was cheap, I hardly ever choose this #112B  pattern from Burda 3/2015 for sewing purposely. It is just the very case to experiment because if my taste betrays and instead of a nice thing,  I get some ugly monster, I won't regret about wasted money and time. I guess this time the taste didn't fail:-)


Отже... чого я "ніколи" не робитиму цього разу :-) По-перше, ніколи не шитиму зі смугастих тканин. Тому що витрачається забагато часу на досягнення симетрії смужок. По-друге, ніколи не оброблятиму розрізні кишені.
Якби  у мене не було 4 м тканини  купленої за смішні гроші, навряд чи я колись обрала цю модель №112 з Burda 3/2015. А з такими тканинами я якраз і експериментую, бо не шкода, якщо мій смак мене раптом зрадить і вийде казна що замість гарної речі. Зрештою, не зрадив:-)


So cutting... brrr:-) Maybe somebody knows other ways to get symmentry but I always pin all the piece of the fabric along the stripes all around the details before using the scissors. You'll never believe how far from the symmetry the piece of stripy fabric can be. I mean I make the stripes  on the both sides check with each other. As for the jackets, I usually leave the pins in the cloth until reinforcing the details and final cutting of the front details.


Отже крій... останній раз:-) Можливо хтось і знає інші способи досягти симетрії крою, але я завжди сколюю булавками тканину вздовж смужок по всій поверхні деталей перед тим, як її різати. Ніколи не повіриш, наскільки далекій від симетрії може бути шматок смугастої тканини. Маю на увазі, що я примушую смужки збігатися з обох боків. І щодо жакетів, я залишаю булавки в тканині допоки не продублюю деталі і не закінчу крій передніх частин.


The item has the long dart on the back and as it was not symmetrical, I replaced it. It is easy to do.  Mark the new centre line of the dart and then just put the paper pattern to the new spot.
The ready dart is mirroring:-)


Виріб має довгу глибоку витачку на спинці. Оскільки вона не була симетричною одразу після крою, її треба було перенести. Це легко зробити, просто намічаємо новий центр витачки і потім прикладаємо викрійку до нових міток.
Як бачимо, готова витачка просто відзеркалюється:-)


After the final cutting of the front details, sew the darts, press them and sew the future pocket opening. The latter is being done with oblique stitches. In this way the firm joining is provided and it is much easily to process the pocket.


Після кінцевого підрізання передніх частин застрочуємо витачки, прасуємо шви і зшиваємо майбутній вхід до кишені. Останнє робимо косим стібком, який забезпечує міцне з'єднання і це полегшує подальше виготовлення кишень.


And only now we can cut the flaps because the lines of the flaps must check with the lines of the fronts. And I was very glad I had no fabric to match these details (I already planned the skirt from the rest of the piece) because I don't like such kind of pockets. And so my decision was to make double welt pockets.
By the way, the same rule concerns the cutting of the pocket bag from the main fabric. But this time I neglected it.


І лише зараз настає час кроїти клапани кишень, тому що смужки на клапанах і на передніх частинах жакету теж мають збігатися. І я була дуже рада, що у мене не стало тканини на підбор тих смужок (я вже спланувала спідницю з решти відрізу), бо я не люблю кишені з клапанами, тому вирішила зробити розрізні кишені в "рамку".
До речі, те саме правило стосується крою і мішковини з основної тканини, але в цьому випадку я їм знехтувала.


I must confess I simplify the way of making such pockets to some degree and this way is not exactly the same we were taught so nobody should follow it, however, I sew in this way.
I don't cut two welts, I cut the only one of double width with seam allowances. After stitching it to the front detail, I cut the welt without cutting the pocket opening. In this way you get two equal welts and the result is always good because it is much easier to make two parallel seams.


Маю зізнатись, що трохи спростила спосіб пошиття таких кишень і нас не зовсім так вчили їх робити, та ніхто і не зобов'язаний наслідувати цей спосіб, але я роблю так.
Не крою дві обшивки для кишень, крою одну, пришиваю її, а вже потім розрізаю по середині, не торкаючись входу до кишені. Таким чином маю дві однакових обшивки і результат завжди гарний, тому що так набагато легше прокласти дві паралельних строчки.


The next step is to cut the pockets' opening. The corners are supposed to be as neater as possible, probably it is the most troublesome moment.
After that press the seam allowances open, fold the welts around them and baste.


Наступний крок - розрізання входу до кишені. Куточки мають бути дуже охайними і треба поводитися з ними дуже обережно. Це мабуть, найбільш морочливий  момент.
Після цього розпрасовуємо припуски на шви, згинаємо обшивки, огинаємо припуск і заметуємо.


Baste the pocket opening again. And next time we'll remove the basting only after the work is finished.


Знову зашиваємо вхід до кишені. І наступного разу будемо видаляти зметування лише по закінченні роботи.


Sew the lining pocket bag. Pay attention to the place of the stitching!


Пришиваємо мішковину кишені з підкладочної тканини. Зверни увагу на місце притачування!


Now stitch the corners. Actually this step can be done together with sewing the pocket bags together. In this case you start the stitching from one corner, then sew the pocket bags (from the lining side) and then finish after stitching the second corner. But I do it separately. At first - corners.


Тепер закріплюємо куточки. Взагалі можна зшити куточки і мішковини одним швом: починаємо від кутка, потім зшиваємо мішковини (зі сторони підкладки), закінчуємо строчку після другого куточка. Але я роблю окремо. Спочатку - куточки.


Now stitch the second welt exactly in the sewing seam, then sew the pockets bags from the main fabric side. Iron!


Тепер пришиваємо другу обшивку точно в шов притачування, зшиваємо мішковини зі сторони основної тканини. Прасуємо!


After the jacket is ready the pockets look in this way.


По закінченню роботи кишені виглядають ось так.


Next headache of such a jacket is an English Collar ( I don't know how they call it in England indeed but here it is named in this way so I do it so).
A couple of tips. Baste the collar into the neckhole always from the collar side.


Наступний головний біль такого жакету - це англійський комір. Не знаю, чи англійці теж його так називають, але тут ми маємо такий термін, мене влаштовує.
Двійко порад. Вметуємо комір в горловину завжди зі сторони коміра.


After stitching the collar, iron the seam allowances open.


Після втачування коміра розпрасовуємо припуски на шви.


You can join the upper and lower collars, facing and the lapels on the sewing machine, at least they say so, but I do it hand sewing with back stitch.


Можна з'єднати верхній і нижній коміри, підборти та раскепи коміру на машинці, принаймні, так вважається, але я роблю це вручну стібком "назад голку".


And to guarantee the nice corners don't forget to make an oblique stitch when sewing the upper and lower collars together.


І щоб гарантувати гарні куточки, не забуваємо дати косий стібок, коли зшиваємо верхній і нижній коміри.


It is almost ready. The way I sew the lining to the jacket is described in details here. In this jacket I made it in the same way including the slit.


Майже готово. Як пришиваю підкладку, я детально розповідала тут.  В цьому жакеті все робиться так само включно зі шліцею.


The jacket is very fitting, I'd rather say tight, but such a design lets it keep the silhouette and not slide from the shoulders because of lower fastening line. And thus the waist stays where it should be and not in the middle of the hips.It makes a nice suit with these trousers. I also found a restored blouse with rich ruffles sewed ages ago but I still like it a lot (pattern #116 from Burda 11/2000). And these earrings added some playful note to the outfit.


Жакет дуже прилягаючий, я б навіть сказала, тісний, але такий крій дозволяє йому тримати форму і не спадати з плечей через занижену лінію застібки і тому талія знаходиться на талії, а не на середині стегон.
Він утворює гарний костюм з цими штанами. Я також знайшла відновлену блузу з пишними шлярками пошиту сто років тому, але вона мені все ще подобається (модель №116 з Burda 11/2000). А ці сережки додали грайливу ноту до вбрання.


So why I chose it then indeed... It probably sounds childish but it is absolutely sincere. I chose it because it buttons lower than the waist line is and was designed corresponding to that indeed. And it means it has deep and wide V-neck. And as I'm in making bijouterie now, it allows to wear ... the whole Christmas garland in that V-neck if I ever want :-) And it is a valuable feature for me:-)


Чому ж я тоді його обрала... Дитяча причина, але ж 100% правдива. Тому що він має застібку нижче талії і справді сконструйований під неї, тобто має глибокий і широкий виріз мисом. А оскільки зараз я захоплююсь виготовленням прикрас, то це дозволяє носити хоч цілу новорічну гірлянду в цьому вирізі. І це робить модель дуже цінною для мене:-)